-40%
Engine Drive Alignment Tool Motor Tool For Volvo SX 3851083 OMC Cobra 18-4442
$ 16.36
- Description
- Size Guide
Description
100% made in usaBest Pricing
Fast Shipping
CNC Machining at its best!
Engine Drive Alignment Bar Motor Tool For Volvo SX 3851083 and OMC Cobra 18-4442
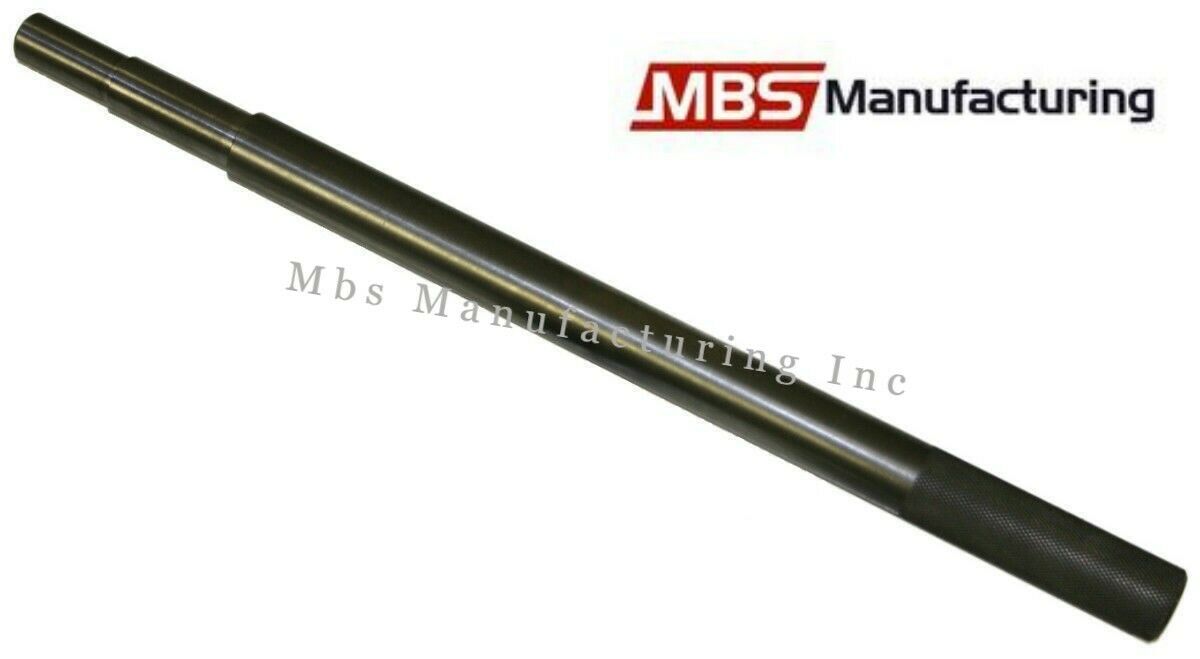
Outdrive Alignment Tool for Mercury / Mercruiser, OMC Cobra, and Volvo SX.
This tool replaces the following part numbers:
MerCruiser
- P/N 91-805475A1 & 91-57797A3.
Volvo SX
- P/N 3851083.
OMC Cobra
- P/N 18-4442.
Will work on Pre-Alpha, Alpha One, Gen 2, R, MR, All Bravo, Volvo SX, OMC Cobra Drives.
Will NOT work for Mercruiser TR and TRS Outdrives.
The length of the Alignment Bar is approximately 23-5/8 inch.
Instructions from Manufacturer:
It is standard policy to check the engine alignment whenever the drive is removed. This can reduce or eliminate coupler failure. The drive should be removed at least once each season to allow for an inspection of the gimbal bearing, bellows, shift cable, and alignment. It also provides an opportunity to properly grease the driveshaft yoke splines and cross bearing.
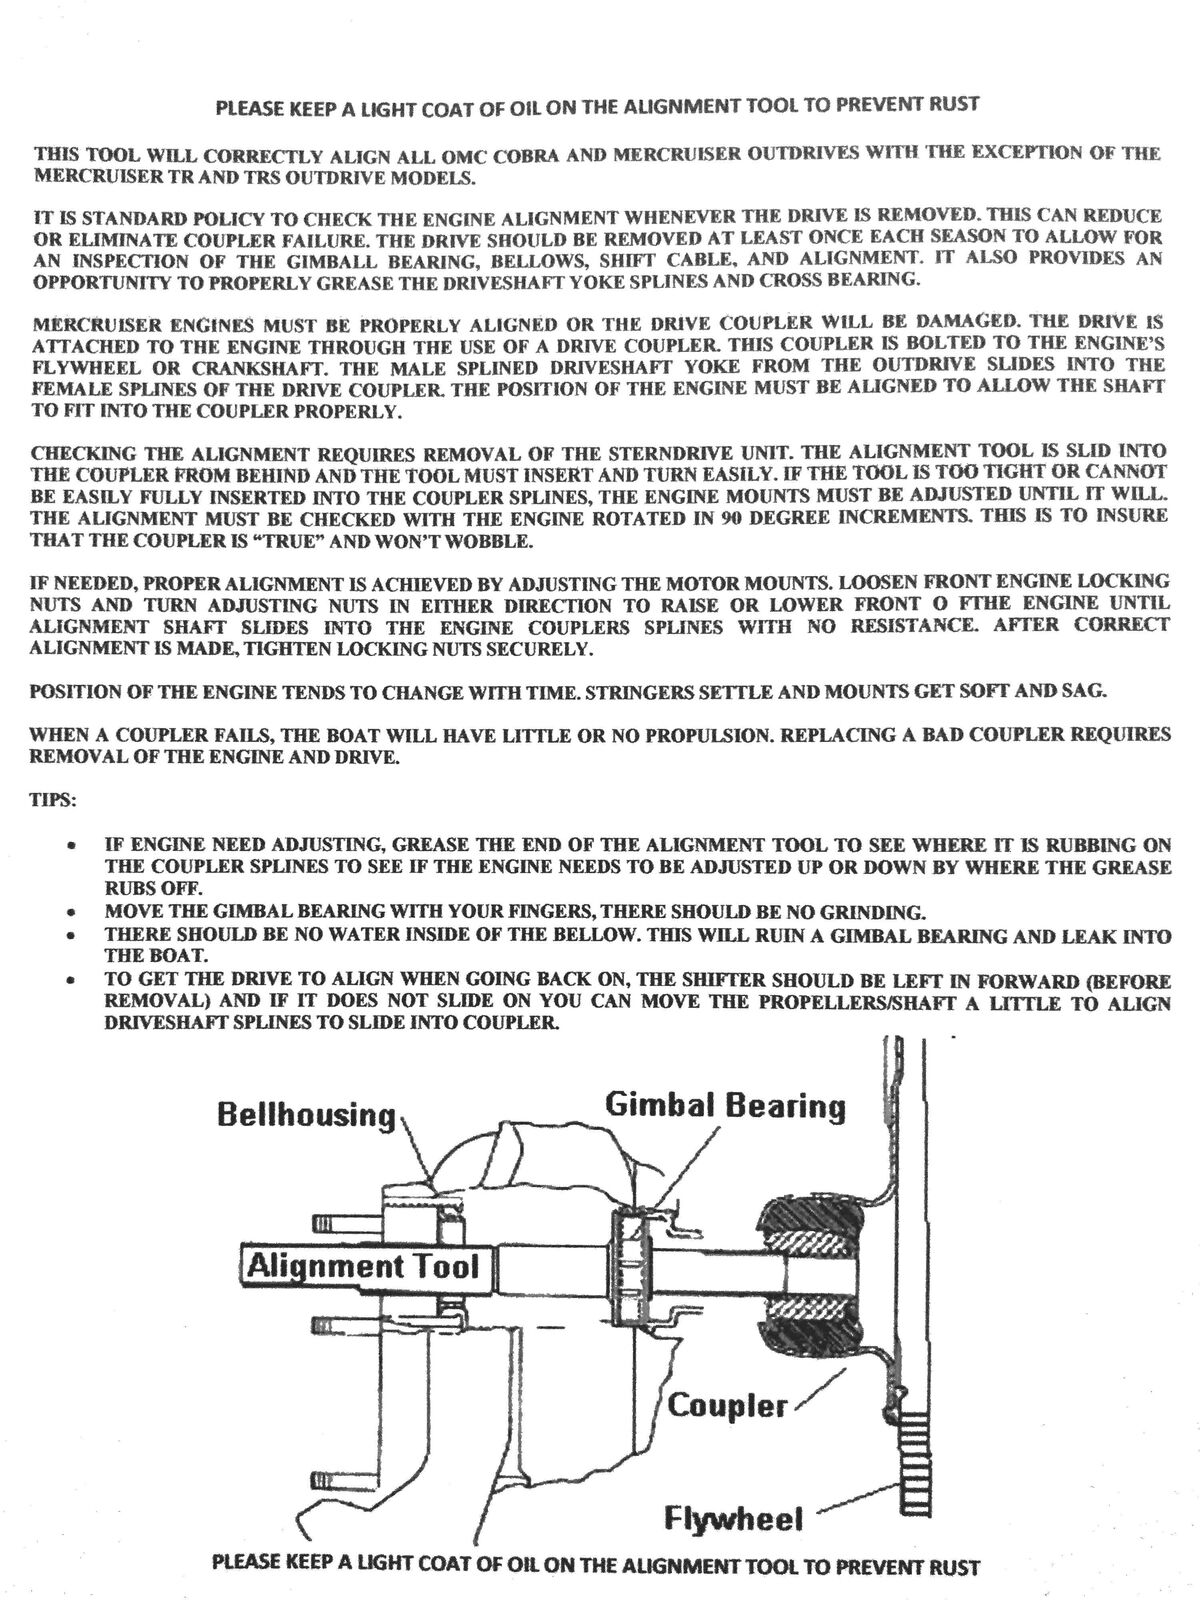
Engines must be properly aligned or the drive coupler will be damaged. The drive is attached to the engine through the use of a drive coupler. This coupler is bolted to the engine's flywheel or crankshaft. The male splined driveshaft yoke from the outdrive slides into the female splines of the drive coupler. The position of the engine must be aligned to allow the shaft to fit into the coupler properly.
Checking the alignment requires the removal of the sterndrive unit. The alignment tool is slid into the coupler form behind and the tool must insert and turn easily. If the tool is too tight or cannot be easily fully inserted into the coupler splines, the engine mounts must be adjusted until it will. The alignment must be checked with the engine rotated in 90 degree increments. This is to insure that the coupler is "true" and won't wobble.
If needed, proper alignment is achieved by adjusting the motor mounts. Loosen the front engine locking nuts, and turn adjusting nuts in either direction to raise or lower the front of the engine until alignment shaft slides into the engine coupler splines with no resistance. After correct alignment is made, tighten locking nuts securely.
Position of the engine tends to change with time. Stringers settle and mounts get soft and sag.
When coupler fails, the watercraft will have little or no propulsion. Replacing a bad coupler requires removal of the engine and driver.
Tips
:
If engine needs adjusting, grease the end of the alignment tool to see where it is rubbing on the coupler splines to see if the engine needs to be adjusted up or down by where the grease rubs off.
Move the gimbal bearing with your fingers, there should be no grinding.
There should be no water inside of the bellow. This will ruin a gimbal bearing, and leak into the boat.
To get the drive to align when going back on, the shifter should be left in FORWARD (Before Removal), and if it does not slide in, you can move the propeller/shaft a little to align driveshaft splines to slide into the coupler.
Buyer Tips:
Check coupler splines for dings/nicks - they may prevent insertion of the alignment tool.
Check coupler for dried grease - may prevent insertion of the tool, even into an aligned engine.
Tool Specs:
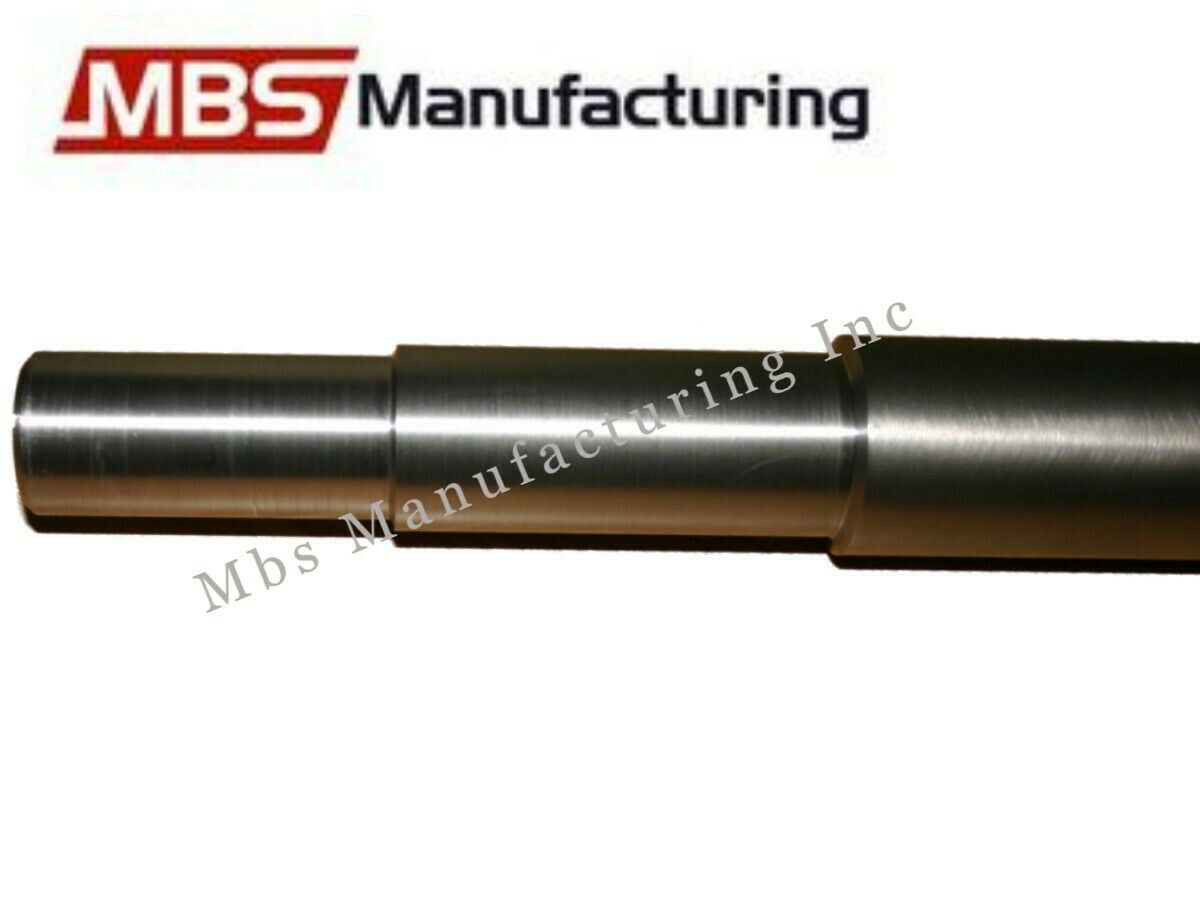
According to MerCruiser service bulletin No 92-9, the alignment tool must have the following sizes from front to back:
1.010"
diameter, 2.200" long (section that fits into coupler),
1.150"
diameter. 2.750" long, and
1.375"
diameter rest of bar (section that fits gimbal bearing inside diameter). We test all of our tools for this fit at the shop, using precision gauges and measuring tools.
Payment
Shipping
Returns
Payment
Shipping
Returns
We accept payment by any of the following methods:
PayPal
Please pay as soon as possible after winning an auction, as that will allow us to post your item to you sooner!
We offer COMBINED shipping on all orders!
Your order will be sent within 1 working day of receiving payment (Monday-Friday) and you should expect to receive it within one to four business days.
In the very unlikely event that your item is lost or damaged on its way to you, then WE are responsible and will issue either a full refund or replacement
If you are not 100% satisfied with your purchase, you can return the product and get a full refund or exchange the product for another one, be it similar or not.
You can return a product for up to 30 days from the date you purchased it.
See our other items
100% Made in usa
Best Pricing
Fast Shipping
Outdrive Alignment Tool for Mercury / Mercruiser, OMC Cobra, and Volvo SX. This tool replaces the following part numbers: MerCruiser - P/N 91-805475A1 & 91-57797A3. Volvo SX - P/N 3851083. OMC Cobra - P/N 18-4442. Will work on Pre-Alpha, Alpha One, Gen 2, R, MR, All Bravo, Volvo SX, OMC Cobra Drives. Will NOT work for Mercruiser TR and TRS Outdrives. The length of the Alignment Bar is approximately 23-5/8 inch. Instructions from Manufacturer: It is standard policy to check the engine alignment whenever the drive is removed. This can reduce or eliminate coupler failure. The drive should be removed at least once each season to allow for an inspection of the gimbal bearing, bellows, shift cable, and alignment. It also provides an opportunity to properly grease the driveshaft yoke splines and cross bearing. Engines must be properly aligned or the drive coupler will be damaged. The drive is attached to the engine through the use of a drive coupler. This coupler is bolted to the engine's flywheel or crankshaft. The male splined driveshaft yoke from the outdrive slides into the female splines of the drive coupler. The position of the engine must be aligned to allow the shaft to fit into the coupler properly. Checking the alignment requires the removal of the sterndrive unit. The alignment tool is slid into the coupler form behind and the tool must insert and turn easily. If the tool is too tight or cannot be easily fully inserted into the coupler splines, the engine mounts must be adjusted until it will. The alignment must be checked with the engine rotated in 90 degree increments. This is to insure that the coupler is "true" and won't wobble. If needed, proper alignment is achieved by adjusting the motor mounts. Loosen the front engine locking nuts, and turn adjusting nuts in either direction to raise or lower the front of the engine until alignment shaft slides into the engine coupler splines with no resistance. After correct alignment is made, tighten locking nuts securely. Position of the engine tends to change with time. Stringers settle and mounts get soft and sag. When coupler fails, the watercraft will have little or no propulsion. Replacing a bad coupler requires removal of the engine and driver. Tips: ---If engine needs adjusting, grease the end of the alignment tool to see where it is rubbing on the coupler splines to see if the engine needs to be adjusted up or down by where the grease rubs off. ---Move the gimbal bearing with your fingers, there should be no grinding. ---There should be no water inside of the bellow. This will ruin a gimbal bearing, and leak into the boat. ---To get the drive to align when going back on, the shifter should be left in FORWARD (Before Removal), and if it does not slide in, you can move the propeller/shaft a little to align driveshaft splines to slide into the coupler. Buyer Tips: ---Check coupler splines for dings/nicks - they may prevent insertion of the alignment tool. ---Check coupler for dried grease - may prevent insertion of the tool, even into an aligned engine. Tool Specs: According to MerCruiser service bulletin No 92-9, the alignment tool must have the following sizes from front to back: 1.010" diameter, 2.200" long (section that fits into coupler), 1.150" diameter. 2.750" long, and 1.375"diameter rest of bar (section that fits gimbal bearing inside diameter). We test all of our tools for this fit at the shop, using precision gauges and measuring tools.
Engine Drive Alignment Bar Motor Tool For Volvo SX 3851083 and OMC Cobra 18-4442
Outdrive Alignment Tool for Mercury / Mercruiser, OMC Cobra, and Volvo SX.
This tool replaces the following part numbers:
MerCruiser
- P/N 91-805475A1 & 91-57797A3.
Volvo SX
- P/N 3851083.
OMC Cobra
- P/N 18-4442.
Will work on Pre-Alpha, Alpha One, Gen 2, R, MR, All Bravo, Volvo SX, OMC Cobra Drives.
Will NOT work for Mercruiser TR and TRS Outdrives.
The length of the Alignment Bar is approximately 23-5/8 inch.
Instructions from Manufacturer:
It is standard policy to check the engine alignment whenever the drive is removed. This can reduce or eliminate coupler failure. The drive should be removed at least once each season to allow for an inspection of the gimbal bearing, bellows, shift cable, and alignment. It also provides an opportunity to properly grease the driveshaft yoke splines and cross bearing.
Engines must be properly aligned or the drive coupler will be damaged. The drive is attached to the engine through the use of a drive coupler. This coupler is bolted to the engine's flywheel or crankshaft. The male splined driveshaft yoke from the outdrive slides into the female splines of the drive coupler. The position of the engine must be aligned to allow the shaft to fit into the coupler properly.
Checking the alignment requires the removal of the sterndrive unit. The alignment tool is slid into the coupler form behind and the tool must insert and turn easily. If the tool is too tight or cannot be easily fully inserted into the coupler splines, the engine mounts must be adjusted until it will. The alignment must be checked with the engine rotated in 90 degree increments. This is to insure that the coupler is "true" and won't wobble.
If needed, proper alignment is achieved by adjusting the motor mounts. Loosen the front engine locking nuts, and turn adjusting nuts in either direction to raise or lower the front of the engine until alignment shaft slides into the engine coupler splines with no resistance. After correct alignment is made, tighten locking nuts securely.
Position of the engine tends to change with time. Stringers settle and mounts get soft and sag.
When coupler fails, the watercraft will have little or no propulsion. Replacing a bad coupler requires removal of the engine and driver.
Tips
:
If engine needs adjusting, grease the end of the alignment tool to see where it is rubbing on the coupler splines to see if the engine needs to be adjusted up or down by where the grease rubs off.
Move the gimbal bearing with your fingers, there should be no grinding.
There should be no water inside of the bellow. This will ruin a gimbal bearing, and leak into the boat.
To get the drive to align when going back on, the shifter should be left in FORWARD (Before Removal), and if it does not slide in, you can move the propeller/shaft a little to align driveshaft splines to slide into the coupler.
Buyer Tips:
Check coupler splines for dings/nicks - they may prevent insertion of the alignment tool.
Check coupler for dried grease - may prevent insertion of the tool, even into an aligned engine.
Tool Specs:
According to MerCruiser service bulletin No 92-9, the alignment tool must have the following sizes from front to back:
1.010"
diameter, 2.200" long (section that fits into coupler),
1.150"
diameter. 2.750" long, and
1.375"
diameter rest of bar (section that fits gimbal bearing inside diameter). We test all of our tools for this fit at the shop, using precision gauges and measuring tools.
Best Pricing
100% made in usa
Fast Shipping
CNC Machining at its best!
See our other items
Payment
We accept payment by any of the following methods:
PayPal
Please pay as soon as possible after winning an auction, as that will allow us to post your item to you sooner!
Shipping
We offer COMBINED shipping on all orders!
Your order will be sent within 1 working day of receiving payment (Monday-Friday) and you should expect to receive it within one to four business days.
In the very unlikely event that your item is lost or damaged on its way to you, then WE are responsible and will issue either a full refund or replacement
Returns
If you are not 100% satisfied with your purchase, you can return the product and get a full refund or exchange the product for another one, be it similar or not.
You can return a product for up to 30 days from the date you purchased it.
100% Made in usa
Best Pricing
Fast Shipping
Outdrive Alignment Tool for Mercury / Mercruiser, OMC Cobra, and Volvo SX.
This tool replaces the following part numbers:
MerCruiser
- P/N 91-805475A1 & 91-57797A3.
Volvo SX
- P/N 3851083.
OMC Cobra
- P/N 18-4442.
Will work on Pre-Alpha, Alpha One, Gen 2, R, MR, All Bravo, Volvo SX, OMC Cobra Drives.
Will NOT work for Mercruiser TR and TRS Outdrives.
The length of the Alignment Bar is approximately 23-5/8 inch.
Instructions from Manufacturer:
It is standard policy to check the engine alignment whenever the drive is removed. This can reduce or eliminate coupler failure. The drive should be removed at least once each season to allow for an inspection of the gimbal bearing, bellows, shift cable, and alignment. It also provides an opportunity to properly grease the driveshaft yoke splines and cross bearing.
Engines must be properly aligned or the drive coupler will be damaged. The drive is attached to the engine through the use of a drive coupler. This coupler is bolted to the engine's flywheel or crankshaft. The male splined driveshaft yoke from the outdrive slides into the female splines of the drive coupler. The position of the engine must be aligned to allow the shaft to fit into the coupler properly.
Checking the alignment requires the removal of the sterndrive unit. The alignment tool is slid into the coupler form behind and the tool must insert and turn easily. If the tool is too tight or cannot be easily fully inserted into the coupler splines, the engine mounts must be adjusted until it will. The alignment must be checked with the engine rotated in 90 degree increments. This is to insure that the coupler is "true" and won't wobble.
If needed, proper alignment is achieved by adjusting the motor mounts. Loosen the front engine locking nuts, and turn adjusting nuts in either direction to raise or lower the front of the engine until alignment shaft slides into the engine coupler splines with no resistance. After correct alignment is made, tighten locking nuts securely.
Position of the engine tends to change with time. Stringers settle and mounts get soft and sag.
When coupler fails, the watercraft will have little or no propulsion. Replacing a bad coupler requires removal of the engine and driver.
Tips
:
If engine needs adjusting, grease the end of the alignment tool to see where it is rubbing on the coupler splines to see if the engine needs to be adjusted up or down by where the grease rubs off.
Move the gimbal bearing with your fingers, there should be no grinding.
There should be no water inside of the bellow. This will ruin a gimbal bearing, and leak into the boat.
To get the drive to align when going back on, the shifter should be left in FORWARD (Before Removal), and if it does not slide in, you can move the propeller/shaft a little to align driveshaft splines to slide into the coupler.
Buyer Tips:
Check coupler splines for dings/nicks - they may prevent insertion of the alignment tool.
Check coupler for dried grease - may prevent insertion of the tool, even into an aligned engine.
Tool Specs:
According to MerCruiser service bulletin No 92-9, the alignment tool must have the following sizes from front to back:
1.010"
diameter, 2.200" long (section that fits into coupler),
1.150"
diameter. 2.750" long, and
1.375"
diameter rest of bar (section that fits gimbal bearing inside diameter). We test all of our tools for this fit at the shop, using precision gauges and measuring tools.


